...about the Burdastyle dress that I began several weeks ago, I never did sew it. After my tantrum over the Swedish tracing paper, I spent a week or two mulling (obsessing) over my possibilities and decided that I really would like to try it in a real fabric, confident that the changes necessary to fit me comfortably were not that complicated.
Unfortunately, a series of time-consuming events got in my way, one of which involved packing up everything in the "sewing room" so that our dining room was clean.
 |
| It looked so clean, I didn't want to clutter it up again! |
I realized that I (still) have a serious problem with acquiring sewing clutter when I filled five boxes with the fabric, patterns and magazines that sat on the table and counter. This doesn't include all the fabric that's already filling the dining room cabinets!
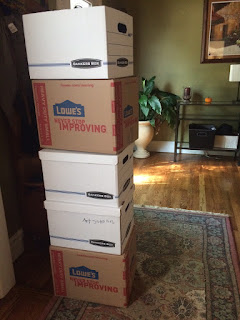 |
| Now where do I put these?! |
Fast forward through my daughter's travel wardrobe and other interruptions and a week or two before the gala, I once again panicked with the thought of nothing to wear. I have a blue velvet dress in the back of my closet that really did spark joy when I cleaned my closet last spring. It is lovely and comfortable, but
sleeveless, which is why I've only worn it once in the 15 years that I've owned it. Since it's usually freezing in December, I decided the quickest solution would be a bolero jacket.
 |
| Vogue 8957 |
Amazingly, I found a nice velvet that matched my dress perfectly, and a taffeta that would have been a nice complement. Vogue 8957 recommended taffeta, dupioni and shantung, but velvet sounded so warm and cozy and
comfortable. My memories of cold winters past convinced me that velvet was necessary. How often do you find a fabric to match perfectly, anyway?
Knowing that pleating of this magnitude would not work well on velvet, I choose to gather the trim into ruffles instead, which worked out fairly well, though it left bulky seam allowances.
Vogue 8957 is a fairly easy pattern to fit and sew, though fitting was not as easy as I expected. I considered not making a muslin, thinking that I wouldn't need an FBA or swayback adjustment, but the velvet was rather expensive. I justified the muslin by telling myself it would help deplete my overflowing stash.
A size 12 was perfect for my shoulder width. However, once the sleeves were on, I felt like I was wearing a straight jacket. Adding 1.5" at the underarm seam and tapering it to the notches worked perfectly. In the end, I was grateful that I took an extra hour to make a muslin.
 |
| Adding 1.5" to the underarm allowed me to move my arms. (I sewed a 12.) |
Since it was so quick to sew, I talked myself into beading to coordinate with the dress. Instead of trusting myself to make nice beaded flowers, I sewed the iridescent glass beads randomly on the jacket, which turned out fine -- it is festive, but next time I will chose a more organized pattern. I underlined the velvet with silk organza to give it some body, and act as a stabilizer for the beading.
 |
| I really liked the pleated/ruffled edge . |
None of the pictures of me wearing the outfit do much to show the jacket, due to poor lighting. To my chagrin, the flash resulted in focus on my bare cleavage. I will spare you the discomfort, and show them on my mannequin, instead where the flash illuminates the fact that the two velvets are in fact not exactly the same. Sans flash, and in a dimly lit ballroom they are a perfect match.
It is lined with a medium-to-heavy bodied satin (not a lining), to add to the warmth factor. Alas, it was 70 degrees the day of the event, and I was plenty warm.
 |
| Vogue 8957, rear view |
I really love the jacket. It makes the dress wearable for me and I hope that I can find other outfits to pair it with in the future.


